| IKAT
Ikat is fabric in which the pattern is tied and dyed
before weaving. Double ikat is when both the weft and warp are
tie-dyed making the complexity many times greater because of
the difficulty of aligning the motifs. We have seen in the design section how the warp was folded
and marked. Now we will look at the wrapping and dyeing.
The areas to remain white and black
are tightly wrapped to resist the red dye bath. Originally plant
material such as palm leaves were used for this purpose. However
now cotton string is used for the fine areas and rubber inner
tube is used for larger area.
The red dye bath is made using alizarin
and alum, another mordant. Alizarin, whether from Morinda
citrifolia, Al tree bark in the tradition way or synthetic sources
requires the same complex treatments. The shade and intensity
varies according to the combination of the variables. Using
a mortar and pestle the ingredients are finely ground before
being dissolved in hot water.
The yarn is then added to the dyebath
and worked by hand to penetrate the areas between the tightly
bound resist areas. After thorough saturation of yarn, the vessel
is taken to the fire to boil for an hour or two. The yarn should
remain in the dyebath until cooling has been completed. If the
intensity of the red colour is not satisfactory, the process
is repeated with a fresh batch of dye.
After rinsing, the yarn is put under
tension while still wet and the areas to be dyed black are unwrapped.
Then the red areas are tightly wrapped to prevent black intrusion.
The black dye is prepared using verakasu (combined with alizarin)
or a fermented iron solution. Again the yarn is submerged into
the dye and worked by hand before being heated.
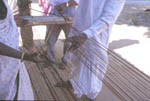
The unwrapping requires great care
especially with the fine cotton ties to avoid cutting the dyed
threads. Displacement of the design can occur if
length is changed. Mending can be achieved by skillful twisting
of the threads causing minimum effect. After unwrapping, the
warp is unfolded to full length, taken outside and realigned
to place the repeated design elements in the correct order.
The plain red border threads and white stripes and edges are
added. Starching of the warps helps to keep the alignment.
The warp is now ready to be attached
to the reed of the loom by twisting the ends with the remains
of the previous cloth woven using that reed. Go along to WEAVING
to see what happens next.
The weft, which is the yarn woven
across the warp to create the fabric still has to be tied and
dyed. But this doesn't happen until the warp is on the loom
and the plain heading is woven so accurate measurements can
be taken concerning the weaving width.
The weft is wound out on a semi-circular
frame with a central peg and many nails on the rim. Each nail
represents a unit in the design module. Repeats of the design
are wound, then tied and dyed as for the warp. After washing
and drying these are wound out on bobbins for the weaving shuttles.
And so it's back to WEAVING! This long process is nearing the
end!
|

warp marked / first wrap

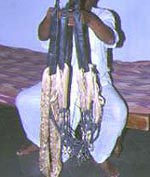
tied warp ready for first dye bath
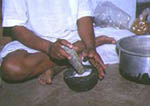
preparing alum

red dye pot, first boil
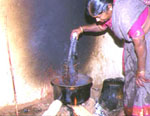
sister Ramulea dyes black
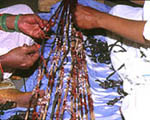
unwrapping after final dye bath

dyed warp unwrapped
taking reed and warp outside
|